
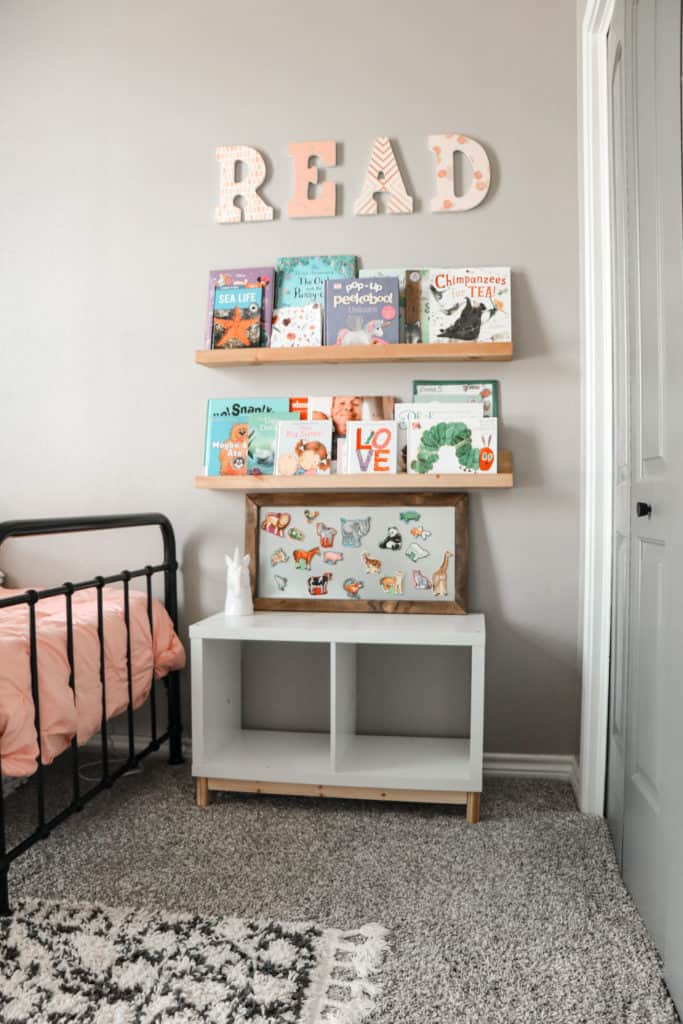
A DIY magnetic message board is perfect for your at home command center, hanging inspirational pictures and quotes. Or simply a fun magnetic board for the kiddos magnets & art work.

I love projects that are multi-functional. This DIY is one of those projects that can be repurposed for so many uses.
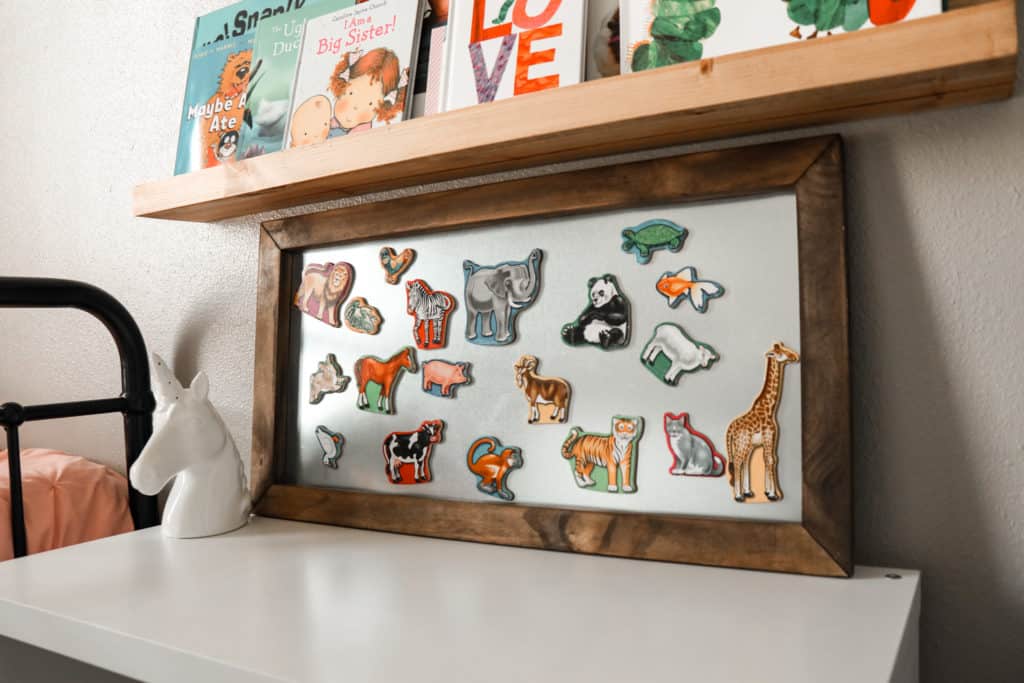
My kids have a ton of those Melissa & Doug animal magnets, and this momma is not about to let them scratch my fridge (again). Today we will be building a super simple DIY that is an inexpensive beginner project.
There is many ways to go about building these galvanized magnetic message boards. But first, I’ll show you the rundown of how I built mine. Then I’ll go over a few other ways you can complete this project with or without power tools.
RELATED- If you are new to DIY and are building your power tool collect read my Must-Have Power Tools for Home DIY!
[AFFILIATE LINKS ARE PROVIDED BELOW FOR CONVENIENCE. FOR MORE INFORMATION SEE MY DISCLOSURE HERE.]
DIY Magnet Board Supply List
- Galvanized Metal Sheet– You can get these in all shapes & sizes. This is the one I got HERE, I decided to go with Amazon.
- Saw Tooth Picture Hangers– Depending on the size of your message board you could need more than one. I went with THESE ones from Amazon. But, have bought this Saw Tooth Hook Wire Kit in the past from Home Depot.
- 1×2 Pine Board– (or whatever wood you prefer) Cut down to whatever size message board you want to make.
- Pre-Stain Wood Conditioner– OPTIONAL-This isn’t required but I love this product & how it prevents streaks and blotches on my wood when staining.
- Stain or Paint– I personally used Minwax Espresso
- Plywood– OPTIONAL-Having a sheet of plywood the size of your frame will make the project more finished looking.
Tools List
- Brush or Rag– To apply stain or paint.
- Nail gun– OPTIONAL-To attach the wood together to make the frame.
- Hammer & Nails– To attach the wood together.
- Wood Glue– I skipped this step (probably shouldn’t have) This is for attaching the frame together.
- Screws– For securing the metal to the wood frame.
- Screwdriver– To screw the galvanized sheet metal to the wood frame.
- Miter Saw– OPTIONAL- If you don’t have a saw you can always have the hardware store cut the wood for you.
- Orbital Sander– I suggest just quickly run your sander over the frame briefly to smooth it out!
- Measuring tape– This one is pretty obvious. Linked is my favorite measuring tape, it has all the lines marked with every measurement!
- Clamps– To hold the frame together when nailing or gluing together!
How To Build A Magnetic Board
1. Making your wood frame
First, you are going to have to cut your 1×2 boards (or whatever wood you prefer) down to size. You will either do this with your miter saw or have The HOME DEPOT do it for you.

You have two ways you can cut your frame. A 90 degree angle or a 45 degree angle. I chose to go with 45 degree angles because it’s what I prefer.
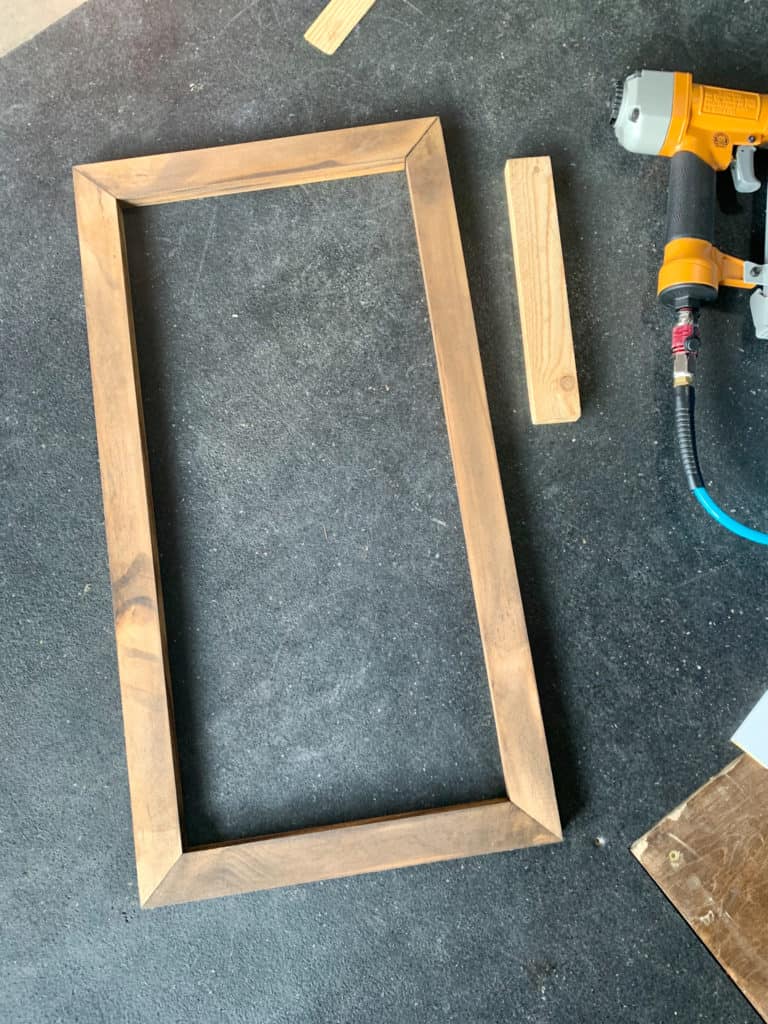
2. Sanding & Staining your Magnetic Board Frame
This step is as easy as it sounds. I chose to use Minwax Espresso on our frame. Some extra steps I took before staining the wood frame was to lightly sand & apply Pre-Stain Wood Conditioner.
Wood conditioner helps prevent streaks and blotches. It allows your stain to go on evenly and gives your wood a more uniformed look. I use to skip this step but after seeing how nicely some of our pieces of furniture looked afterwards. I won’t be skipping it anymore!
Want more info on wood conditioner?
If you want to learn more about pre-stain wood conditioner you can read my guide here!
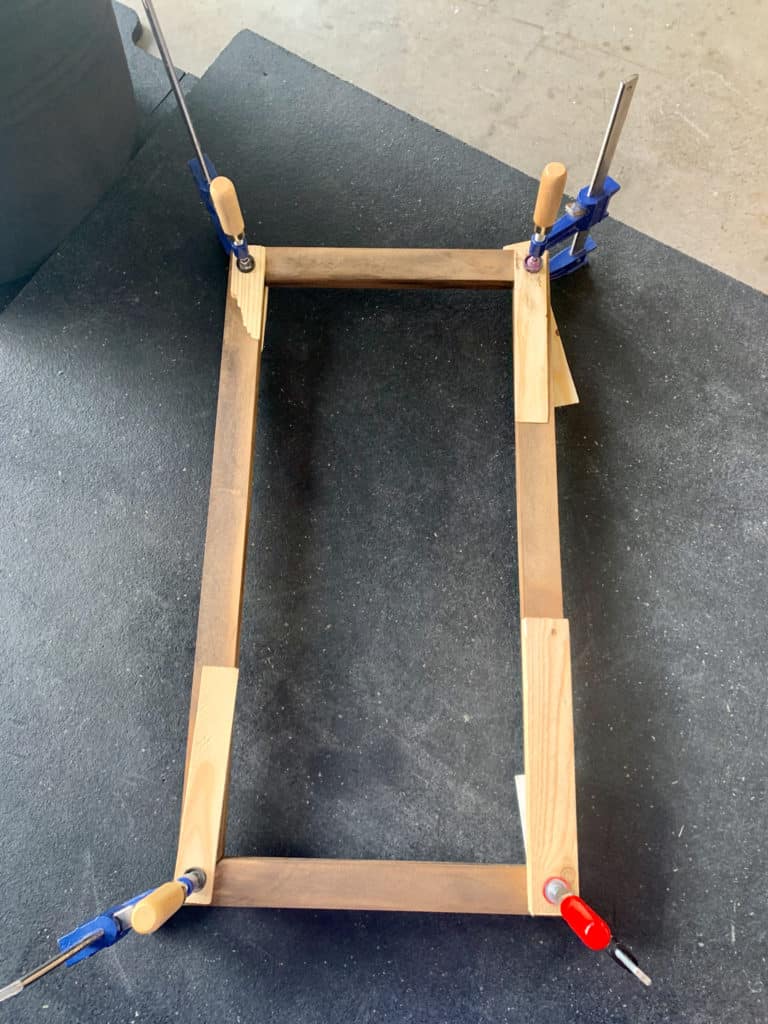
3. Assembling your Magnetic Message Board frame
Depending on what size wood you choose to use you could do this many ways. We chose to just use our nail gun. But, some people use just a simple hammer and nails, wood glue or Kreg Screws.
Normally we use Kreg Screws for almost all our projects. If you currently don’t own a Kreg Jig you’re missing out! If you plan to make furniture, diy projects or picture frames I highly recommend investing in one.
Check out Angela Marie Made’s tutorial on her DIY Magnetic Board if you would love to see a frame assembled with the Kreg Screws.

First step in assembling our magnetic message board was my husband took his clamps and clamped all four edges together. After they were all secure I went in with the nail gun and put two nails in each corner. Making sure they were sturdy and weren’t going anywhere.

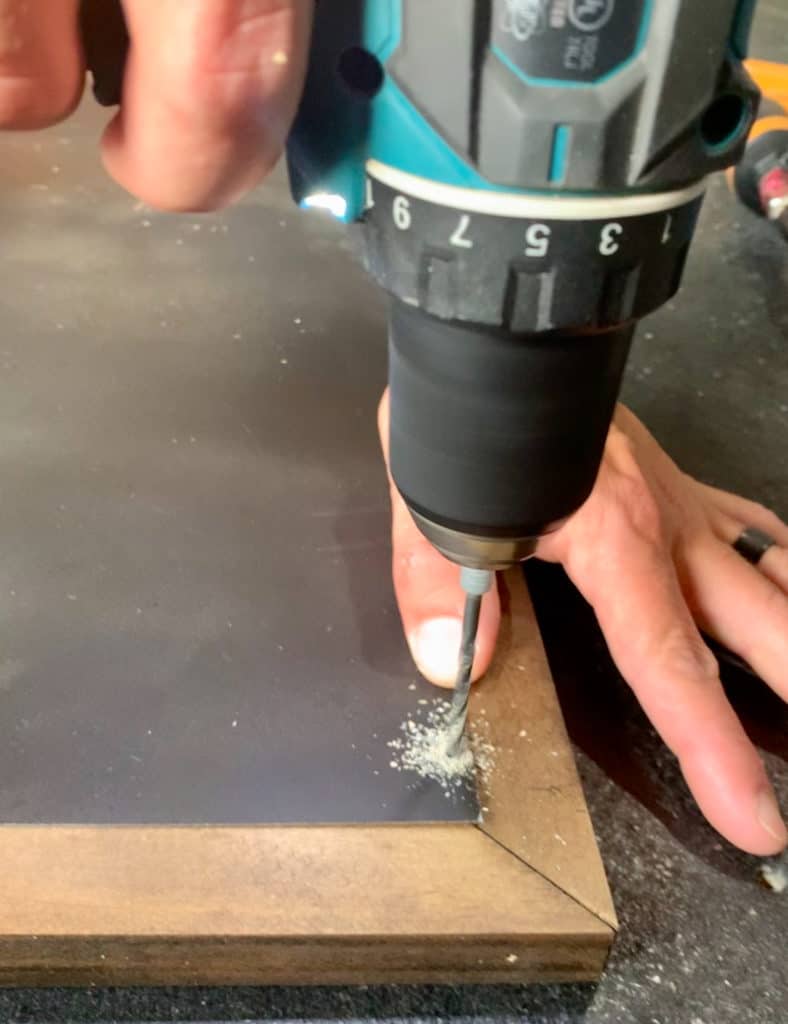
4. Attaching the Magnetic Message Board Frame to Sheet Metal
This step you have to be careful with because, one little mistake could leave you drilling through to the front of your frame. Take your frame and your sheet metal and clamp it together. Once secure, pre-drill holes through the metal and half way through the frame.
Go slow & don’t get carried away! If you’re anything like me sometimes I get excited towards the end of a project and tend to get sloppy in hopes to finish and see the end result sooner. Last thing you want is your screw poking through the front of the frame.
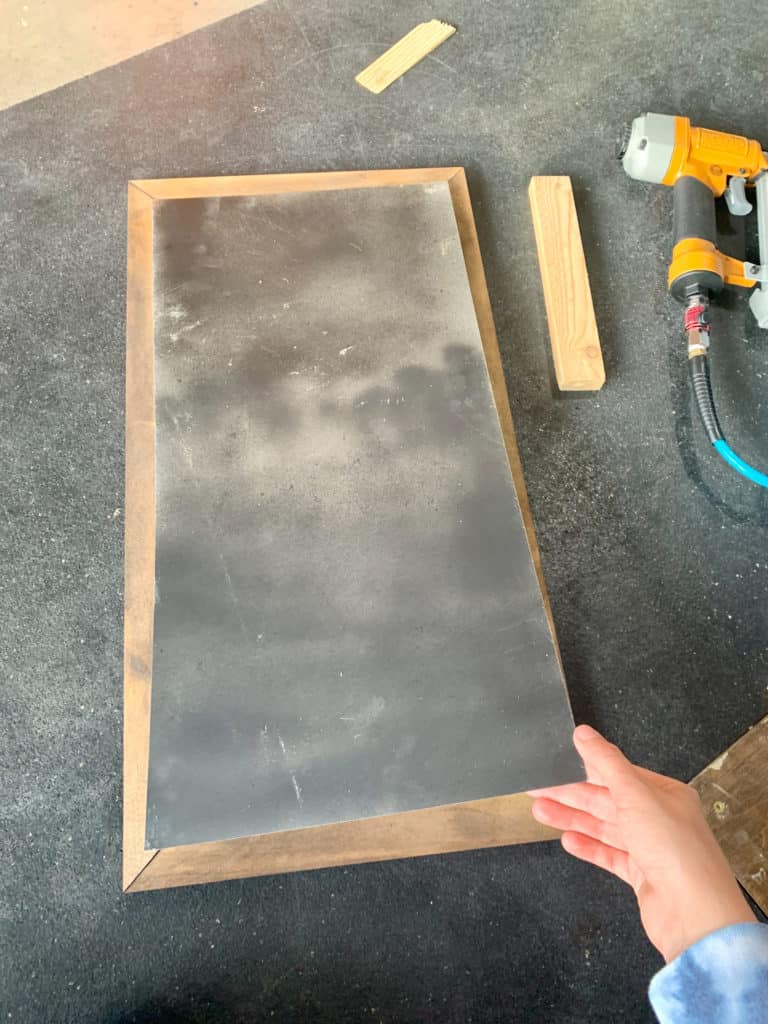
There you have it a Magnetic Message Board! Just add your sawtooth picture hangers and your ready to display your masterpiece!
Make sure to follow along over on INSTAGRAM & save this tutorial on PINTEREST for a later time!

[Safety is of great importance when working on DIY projects. Always follow proper safety guidelines, wear appropriate personal protective equipment, and adhere to local building codes and regulations. READ MY FULL DISCLAIMER HERE.]